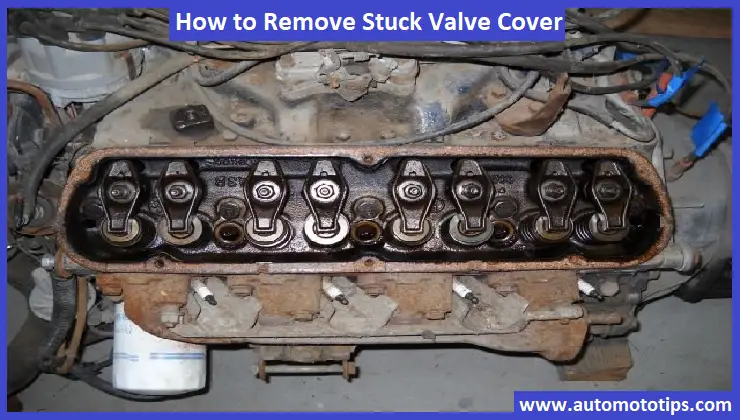
Is your car’s engine making unusual noises or showing signs of reduced performance? One potential culprit might be a stuck valve cover. A valve cover is a crucial component that protects the valves and camshafts inside the engine. If it gets stuck, it can lead to a host of issues, including oil leaks and decreased engine efficiency.
In this step-by-step guide, we will walk you through the process of removing a stuck valve cover step by step. By following these instructions, you can save time and money by tackling this task.
Contents
What is the Importance of a Valve Cover?
Before we delve into the removal process, it’s important to understand the role of a valve cover in your vehicle’s engine. The valve cover sits on top of the cylinder head and is designed to seal the internal components, such as valves, camshafts, and rocker arms. It also prevents oil from leaking out and dust from entering the engine. Over time, due to heat, pressure, and exposure to the elements, the valve cover gasket can deteriorate or become stuck, leading to leaks and potential engine damage.
Tools and Materials You Will Need
To successfully remove a stuck valve cover, gather the following tools and materials:
Socket Wrench Set: Different sizes of socket wrenches will be needed to remove the bolts securing the valve cover.
Screwdrivers: Flat-head and Phillips-head screwdrivers may be necessary to pry open the valve cover gently.
Rubber Mallet: A rubber mallet can help loosen the valve cover if it’s stuck due to gasket adhesion.
Gasket Scraper: This tool will aid in removing the old gasket material without damaging the engine components.
Shop Rags: Keep plenty of shop rags on hand to clean the work area and wipe off any excess oil.
How to Remove Stuck Valve Cover: Step-by-Step Process
Follow these steps to safely remove a stuck valve cover:
Prepare Your Workspace: Park your vehicle on a level surface and allow the engine to cool down. Open the hood and disconnect the battery to prevent any electrical mishaps.
Access the Valve Cover: Depending on your vehicle’s make and model, you may need to remove other components, such as air intake tubes or engine covers, to access the valve cover.
Loosen the Bolts: Using the appropriate socket wrench, gently loosen the bolts securing the valve cover. Start with the bolts in the corners and work your way toward the center in a crisscross pattern.
Pry Open the Cover: If the valve cover is stuck due to gasket adhesion, carefully insert a flat-head screwdriver between the cover and the engine. Gently pry open the cover to break the seal.
Tap with Rubber Mallet: If the valve cover still doesn’t budge, use a rubber mallet to tap it lightly around the edges. This can help dislodge the cover without causing damage.
Remove Old Gasket: Once the valve cover is off, use a gasket scraper to remove the old gasket material from both the cover and the engine. Take care not to scratch or gouge the surfaces.
Clean and Inspect: Wipe down the valve cover and the surrounding area with shop rags. Inspect the cover for any cracks or damage, and ensure that the sealing surfaces on both the cover and the engine are clean and smooth.
Install New Gasket: Place a new gasket onto the valve cover and carefully place the cover back onto the engine. Make sure the bolt holes align properly.
Tighten Bolts: Begin tightening the bolts by hand to avoid cross-threading. Then, using the socket wrench, tighten the bolts in a crisscross pattern to the manufacturer’s recommended torque specifications.
Reconnect Components: If you removed any additional components to access the valve cover, reattach them carefully.
Tips for Preventing Future Stuck Valve Covers
- Regularly check and change the engine oil.
- Avoid over-tightening the valve cover bolts.
- Keep the valve cover and surrounding area clean from debris.
Common Mistakes to Avoid
- Using excessive force when prying open the valve cover.
- Not cleaning the gasket sealing surface thoroughly.
- Neglecting to replace a damaged valve cover gasket.
FAQs
Q: Is it possible to reuse the old valve cover gasket?
A: While it’s possible, it’s recommended to use a new gasket to ensure a reliable seal.
Q: Can I continue driving with a stuck valve cover?
A: Driving with a stuck valve cover is not recommended, as it can exacerbate existing issues and potentially cause further damage.
Q: Can I use any type of penetrating oil?
A: While various penetrating oils can work, it’s best to use a specialized product like WD-40, as it’s designed to penetrate rust and grime effectively.
Q: Is there a risk of damaging the engine while removing the cover?
A: When using the right techniques and tools, the risk is minimal. Just remember to work patiently and avoid applying excessive force.
Q: How often should I check my valve cover to prevent it from getting stuck?
A: Regular engine maintenance is key. Check your valve cover during routine inspections, and if you notice any signs of sticking or difficulty, address it promptly.
Conclusion
Removing a stuck valve cover may seem daunting, but with the right tools and a systematic approach, it’s a task you can tackle successfully. By following the steps outlined in this guide, you can ensure the health and longevity of your engine. Regular maintenance, including checking and, if necessary, removing and replacing the valve cover, will contribute to a smooth-running vehicle.

